- Google Tag Manager is a free tool from Google that lets you add and manage tracking codes on your website without touching any code
- GTM works through three core elements: tags, triggers, and variables that together control what gets tracked and when
- Connecting GTM with Google Analytics 4 gives you a complete picture of how visitors behave on your website
- GTM directly supports SEO by tracking user behaviour signals like scroll depth, button clicks, and form submissions
- You do not need developer skills to install and use Google Tag Manager on a WordPress website
1 What Is Google Tag Manager and Why Every Website Owner Needs to Know About It
If you have ever tried to add a tracking code to your website and felt completely lost, Google Tag Manager was built specifically to solve that problem.
Google Tag Manager, commonly called GTM, is a free tag management system from Google. It allows website owners, marketers, and SEO specialists to install, manage, and update tracking codes on their websites without editing the site’s source code directly. Instead of asking a developer to add a new piece of code every time you want to track something, you log into GTM, create a tag, and deploy it in minutes.
Before GTM existed, adding multiple tracking scripts to a website was a messy, error-prone process. Every new tool, whether Google Analytics, Facebook Pixel, HotJar, or a conversion tracking script, required a developer to manually insert code into the website’s HTML. One mistake could break the entire tracking setup or slow the site down significantly.
Google Tag Manager changed all of that by acting as a single container that sits on your website and manages all your tracking codes from one central dashboard.
In many years of working on SEO and analytics setups for clients across multiple industries, I have never built a tracking infrastructure without GTM at the centre. It is not optional for serious websites. It is the foundation.
2 What Is Google Tag Manager Used For | The Real World Applications
Most beginner guides describe GTM in abstract terms. Let me show you exactly what real website owners and marketers use it for every day.
Google Analytics 4 tracking: The most common use of GTM is deploying the GA4 tracking code across an entire website from one place. Instead of pasting the analytics code manually into every page of your site, you add it once inside GTM and it fires automatically on every page.
Conversion tracking for Google Ads: When someone fills out your contact form or completes a purchase, GTM can fire a conversion tracking tag that reports that action directly to Google Ads. This tells Google which ad clicks led to real business outcomes so your ad targeting improves over time.
Facebook and Meta Pixel installation: GTM lets you install and configure the Meta Pixel without touching your website code. You can then track which pages visitors viewed, which products they added to their cart, and which ads drove them to your site.
Scroll depth tracking: GTM can track how far down a page users scroll before leaving. This data is invaluable for understanding whether your content is engaging enough to hold attention past the first screen.
Form submission tracking: Every time a visitor completes a contact form, GTM can fire a tag that records that event in GA4. This connects marketing activity directly to lead generation outcomes.
Heat mapping and session recording tools: Tools like Hotjar and Microsoft Clarity can be installed through GTM without a developer, giving you visual data on exactly how visitors interact with each page.
3 How Does Google Tag Manager Actually Work | Tags, Triggers and Variables Explained
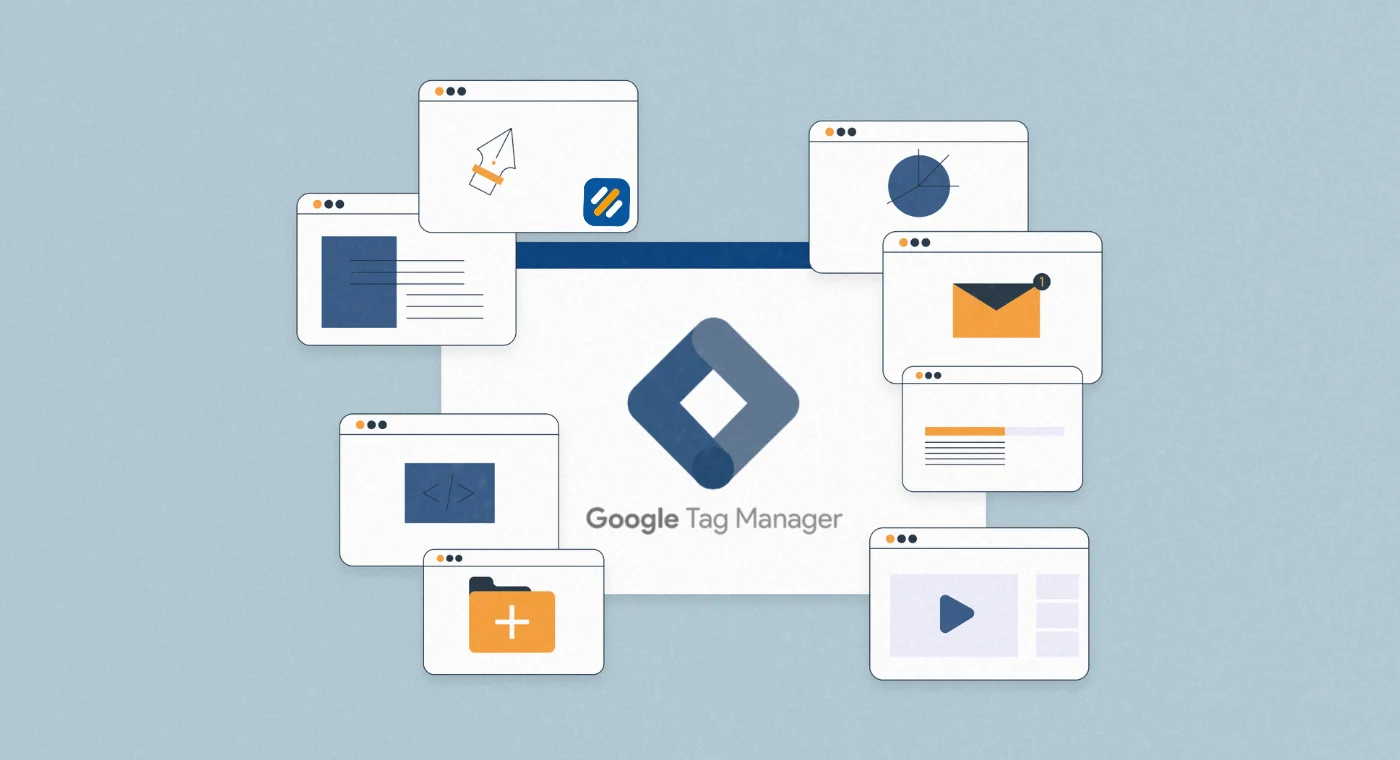
Understanding how GTM works under the hood makes using it ten times easier. The entire system is built on three components that work together.
Tags are the actual pieces of code or tracking scripts you want to fire on your website. A tag could be your GA4 tracking code, your Facebook Pixel, a LinkedIn Insight Tag, or any other third party script. The tag is the what. What code gets executed.
Triggers tell GTM when and where to fire a tag. A trigger could be “fire when any page loads,” “fire when the contact form is submitted,” “fire when a user scrolls 75% down the page,” or “fire when a specific button is clicked.” The trigger is the when. When the code gets executed.
Variables provide additional information that tags and triggers need to function correctly. A variable might store your GA4 Measurement ID, a specific page URL, a form field value, or an element’s class name. Variables make tags and triggers dynamic so they can work across different pages and scenarios without manual adjustment.
Here is a simple real-world example of how all three work together. You want to track every time someone clicks the “Contact Us” button on your homepage.
- The Tag is your GA4 event tag set to send a “contact_button_click” event to Google Analytics
- The Trigger is set to fire when a click occurs on the element with the ID “contact-btn”
- The Variable stores your GA4 Measurement ID so the tag knows which analytics property to send data to
When a visitor clicks the button, the trigger fires, the variable supplies the necessary ID, and the tag sends the event to GA4. All of this happens in milliseconds without any page reload and without any developer involvement after the initial setup.
4 What Is a Google Tag Manager Container and How Does It Work
When you first create a GTM account, the first thing you set up is a container. Understanding what a container is makes the entire GTM system much easier to navigate.
A GTM container is a single code snippet that you install on your website once. Every tag, trigger, and variable you create inside GTM lives within this container. When your website loads, the container code fires and GTM decides which tags to activate based on the triggers you have configured.
Think of the container like a shipping box. All your tracking tools go inside the box. GTM manages the box. Your website only needs to know the box exists, not what is inside it.
GTM offers four types of containers depending on what you want to track
| Container Type | What It Tracks | Best For |
|---|---|---|
| Web | Desktop and mobile website pages | Blogs, business websites, ecommerce stores |
| iOS App | User behaviour inside iOS mobile apps | App developers tracking in-app events |
| Android App | User behaviour inside Android mobile apps | App developers tracking in-app events |
| AMP | Accelerated Mobile Pages | Publishers using Google AMP for fast mobile content |
| Server-side | Tags processed on a server rather than the browser | Privacy-focused tracking, faster page loads |
For most website owners reading this, the Web container is what you need. It installs with two small code snippets, one in the head of your HTML and one immediately after the opening body tag.
5 How to Set Up Google Tag Manager on Your Website Step by Step
Setting up GTM for the first time takes under 30 minutes. Here is the exact process:
Step 1: Create your GTM account
Go to tagmanager.google.com and sign in with your Google account. Click Create Account. Enter your account name, your country, and your website URL. Select Web as your container type. Click Create and accept the terms of service.
Step 2: Install the container code on your website
GTM will immediately show you two code snippets. The first goes inside the head tag of every page. The second goes immediately after the opening body tag. On WordPress, the easiest way to add these is through a plugin like Insert Headers and Footers or directly through your theme’s header.php file.
Step 3: Verify the installation
Install the Google Tag Assistant browser extension from the Chrome Web Store. Visit your website and click the Tag Assistant icon. If your GTM container is detected correctly, it will show green. This confirms GTM is firing properly before you add any tags.
Step 4: Connect Google Analytics 4
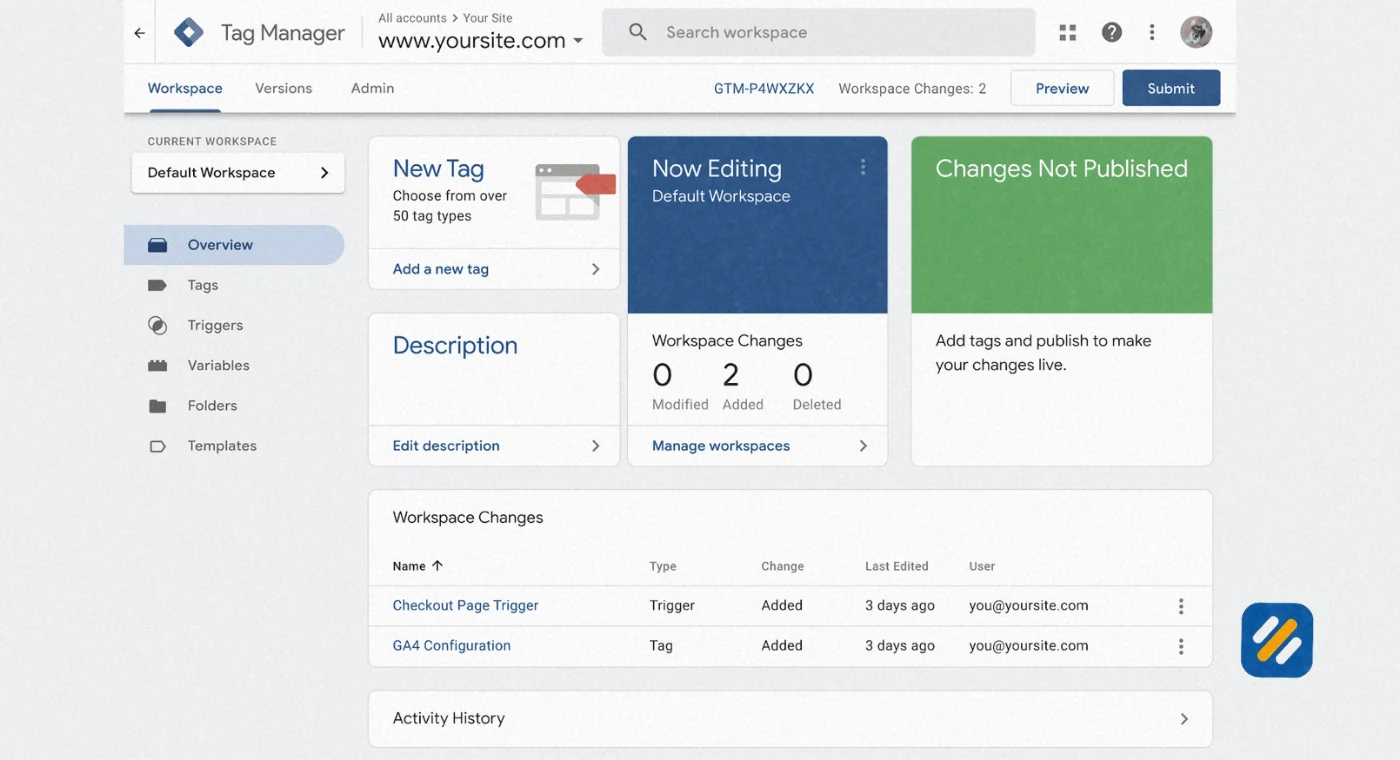
Inside GTM, click Tags then New. Click Tag Configuration and select Google Tag. Enter your GA4 Measurement ID, which you find in your GA4 property under Admin then Data Streams. Set the trigger to All Pages. Click Save then Submit to publish.
Step 5: Test before publishing
Always use GTM’s built-in Preview mode before publishing any changes. Click Preview at the top right of GTM, enter your website URL, and GTM opens a debugging panel showing exactly which tags fired on each page and whether they triggered correctly.
Step 6: Publish your container
Once everything checks out in Preview mode, click Submit then Publish. Your tags are now live on your website.
6 How to Connect Google Tag Manager With Google Analytics 4
Connecting GTM with GA4 is the most important integration you will set up. Here is the exact process in detail so nothing gets missed
Inside Google Analytics 4:
Go to Admin then Data Streams. Click on your web stream. Copy the Measurement ID, which starts with G- followed by a series of letters and numbers. Keep this tab open.
Inside Google Tag Manager:
Click Tags then New. Name the tag “GA4 Configuration.” Click Tag Configuration and select Google Tag from the list. Paste your Measurement ID into the Tag ID field. Under Triggering, click the plus icon and select All Pages. Click Save.
Test the connection:
Click Preview in GTM and visit your website. In the GTM debugger panel, you should see your GA4 tag firing on each page load. Then open GA4 and go to Reports then Realtime. You should see yourself appearing as an active user on your site within 30 seconds.
Publish when confirmed:
Click Submit in GTM and write a version description like “Added GA4 Configuration Tag.” Click Publish. Your GA4 tracking is now live through GTM across your entire website.
7 How Google Tag Manager Helps Your SEO Directly
This is the section most GTM guides skip entirely. GTM is not just an analytics tool. Used correctly, it gives you SEO data that most websites are completely blind to.
Tracking user engagement signals: Google uses engagement signals like time on page, scroll depth, and interaction rate as indirect ranking signals. GTM lets you track all of these in GA4 without any code changes. When you can see that users consistently scroll only 30% down a specific article before leaving, you know exactly where the content is losing them and what to fix.
Monitoring Core Web Vitals triggers: GTM can fire tags based on page performance thresholds. You can set up triggers that alert your analytics system when a page exceeds a certain load time, giving you real-time performance data tied to specific user sessions.
Tracking internal link clicks: GTM can record every click on your internal links and send that data to GA4. This tells you which internal links users actually click versus which ones they ignore, giving you data to improve your internal linking strategy based on real behaviour rather than assumptions.
Monitoring 404 error pages: GTM can be configured to fire a specific tag whenever a user lands on your 404 error page and send that event to GA4 with the referring URL. This gives you a live log of broken links that are affecting both user experience and SEO without running a separate crawl tool.
Form abandonment tracking: GTM can track when a user starts filling out a form but does not submit it. This user friction data points directly to conversion and engagement problems that can indirectly hurt your organic search performance.
| GTM Tracking Capability | SEO Benefit | How to Set It Up in GTM |
|---|---|---|
| Scroll depth tracking | Reveals content engagement quality | Use built-in Scroll Depth trigger type |
| Internal link click tracking | Improves internal linking strategy | Use Click trigger on anchor elements |
| 404 page tracking | Identifies broken links automatically | Fire tag when page title contains “not found” |
| Form submission tracking | Connects SEO traffic to lead generation | Use Form Submission trigger type |
| Page load time monitoring | Supports Core Web Vitals improvement | Use custom JavaScript variable for load time |
| Video engagement tracking | Measures content depth for YouTube embeds | Use built-in YouTube Video trigger type |
8 What Is GoogleTagManager.com and Why Is It Tracking You
If you have ever looked at your browser’s network requests or your website’s outbound connections and seen requests going to googletagmanager.com, you may have wondered what that is and whether it is something to be concerned about.
Googletagmanager.com is the domain where GTM’s container scripts are hosted by Google. When a visitor loads a website that uses GTM, their browser makes a request to googletagmanager.com to load the container code. This is completely normal and expected behaviour for any website running GTM.
The reason it appears to be “tracking” your browsing is because the GTM container loads the tracking tags that the website owner has configured. If a website has GA4, Facebook Pixel, and a HotJar script all managed through GTM, all three will fire when you visit that site and the requests will all appear to originate from or connect through googletagmanager.com.
This is not Google directly spying on individual users through GTM. GTM is a delivery mechanism for whatever tracking the website owner has set up. The data collected depends entirely on which tags the site owner has configured, not on GTM itself.
If you are a website owner and you see googletagmanager.com connections on your own site, this is simply confirmation that your GTM container is loading correctly.
9 How to Remove Google Tag Manager From Your Website
There are situations where you might want to remove GTM from a website entirely. Perhaps you are switching to a different tag management system, simplifying your tracking setup, or taking over a website where GTM was installed by a previous developer and you want to start fresh.
Here is how to remove GTM correctly without leaving ghost code behind
Step 1: Remove the GTM container code from your website
Find the two GTM code snippets in your website’s HTML, one in the head section and one immediately after the opening body tag. Delete both completely. On WordPress, if these were added through a plugin like Insert Headers and Footers, go to that plugin’s settings and remove the GTM snippets from both fields.
Step 2: Verify removal
Use the Google Tag Assistant browser extension to visit your website and confirm that no GTM container is detected. The extension should show no active containers if removal was successful.
Step 3: Update your analytics setup
If you were using GTM to fire GA4 or any other tracking tool, removing GTM will also remove those tracking codes. Install the GA4 tracking code directly on your website through the Google Site Kit plugin on WordPress, or by hardcoding the GA4 snippet into your website’s header.
Step 4: Archive your GTM container before deleting
Before removing GTM permanently, export your container configuration from within GTM under Admin then Export Container. This gives you a JSON backup of all your tags, triggers, and variables in case you ever need to reference them or rebuild the setup later.
10 3 Expert Tips to Get More From Google Tag Manager
Tip 1: Always use Preview mode before publishing any changes
Never publish a new tag or trigger directly without testing it in GTM’s Preview mode first. A misconfigured trigger can cause tags to fire on every click across your entire site, flooding your analytics with junk data that takes hours to clean up.
Tip 2: Name your tags and triggers clearly from day one
As your GTM container grows, vague names like “Tag 1” or “New Trigger” become impossible to manage. Use a consistent naming convention from the start such as “GA4 Contact Form Submission” or “Meta Pixel All Pages.” This saves enormous time when you or a colleague needs to audit or update the setup months later.
Tip 3: Use GTM’s built-in version history as a safety net
Every time you publish changes in GTM, it creates a new version with a timestamp. If a new tag breaks something on your website, you can roll back to the previous working version in seconds from the Versions tab. Always write a clear description when publishing so you can identify which version to restore if needed.
11 Conclusion
Google Tag Manager is one of the most powerful free tools available to any website owner, marketer, or SEO specialist. It removes the technical barrier between wanting to track something on your website and actually tracking it, and it gives you a single organised system for managing every piece of tracking code your site uses.
The setup takes less than an hour. The payoff is complete visibility into how your visitors behave, where your conversions come from, and which pages are performing or underperforming. All of that data feeds directly into better SEO decisions, better content strategy, and better business outcomes.
Start with your GA4 connection. Add scroll depth tracking next. Then build from there as your confidence grows.
Have a question about setting up Google Tag Manager or connecting it to your analytics? Drop it in the comments below and I will answer it personally.
Join 1,000+ business owners and bloggers who get one actionable SEO tip every week — straight to their inbox. Free forever.
Get Free Weekly Tips →